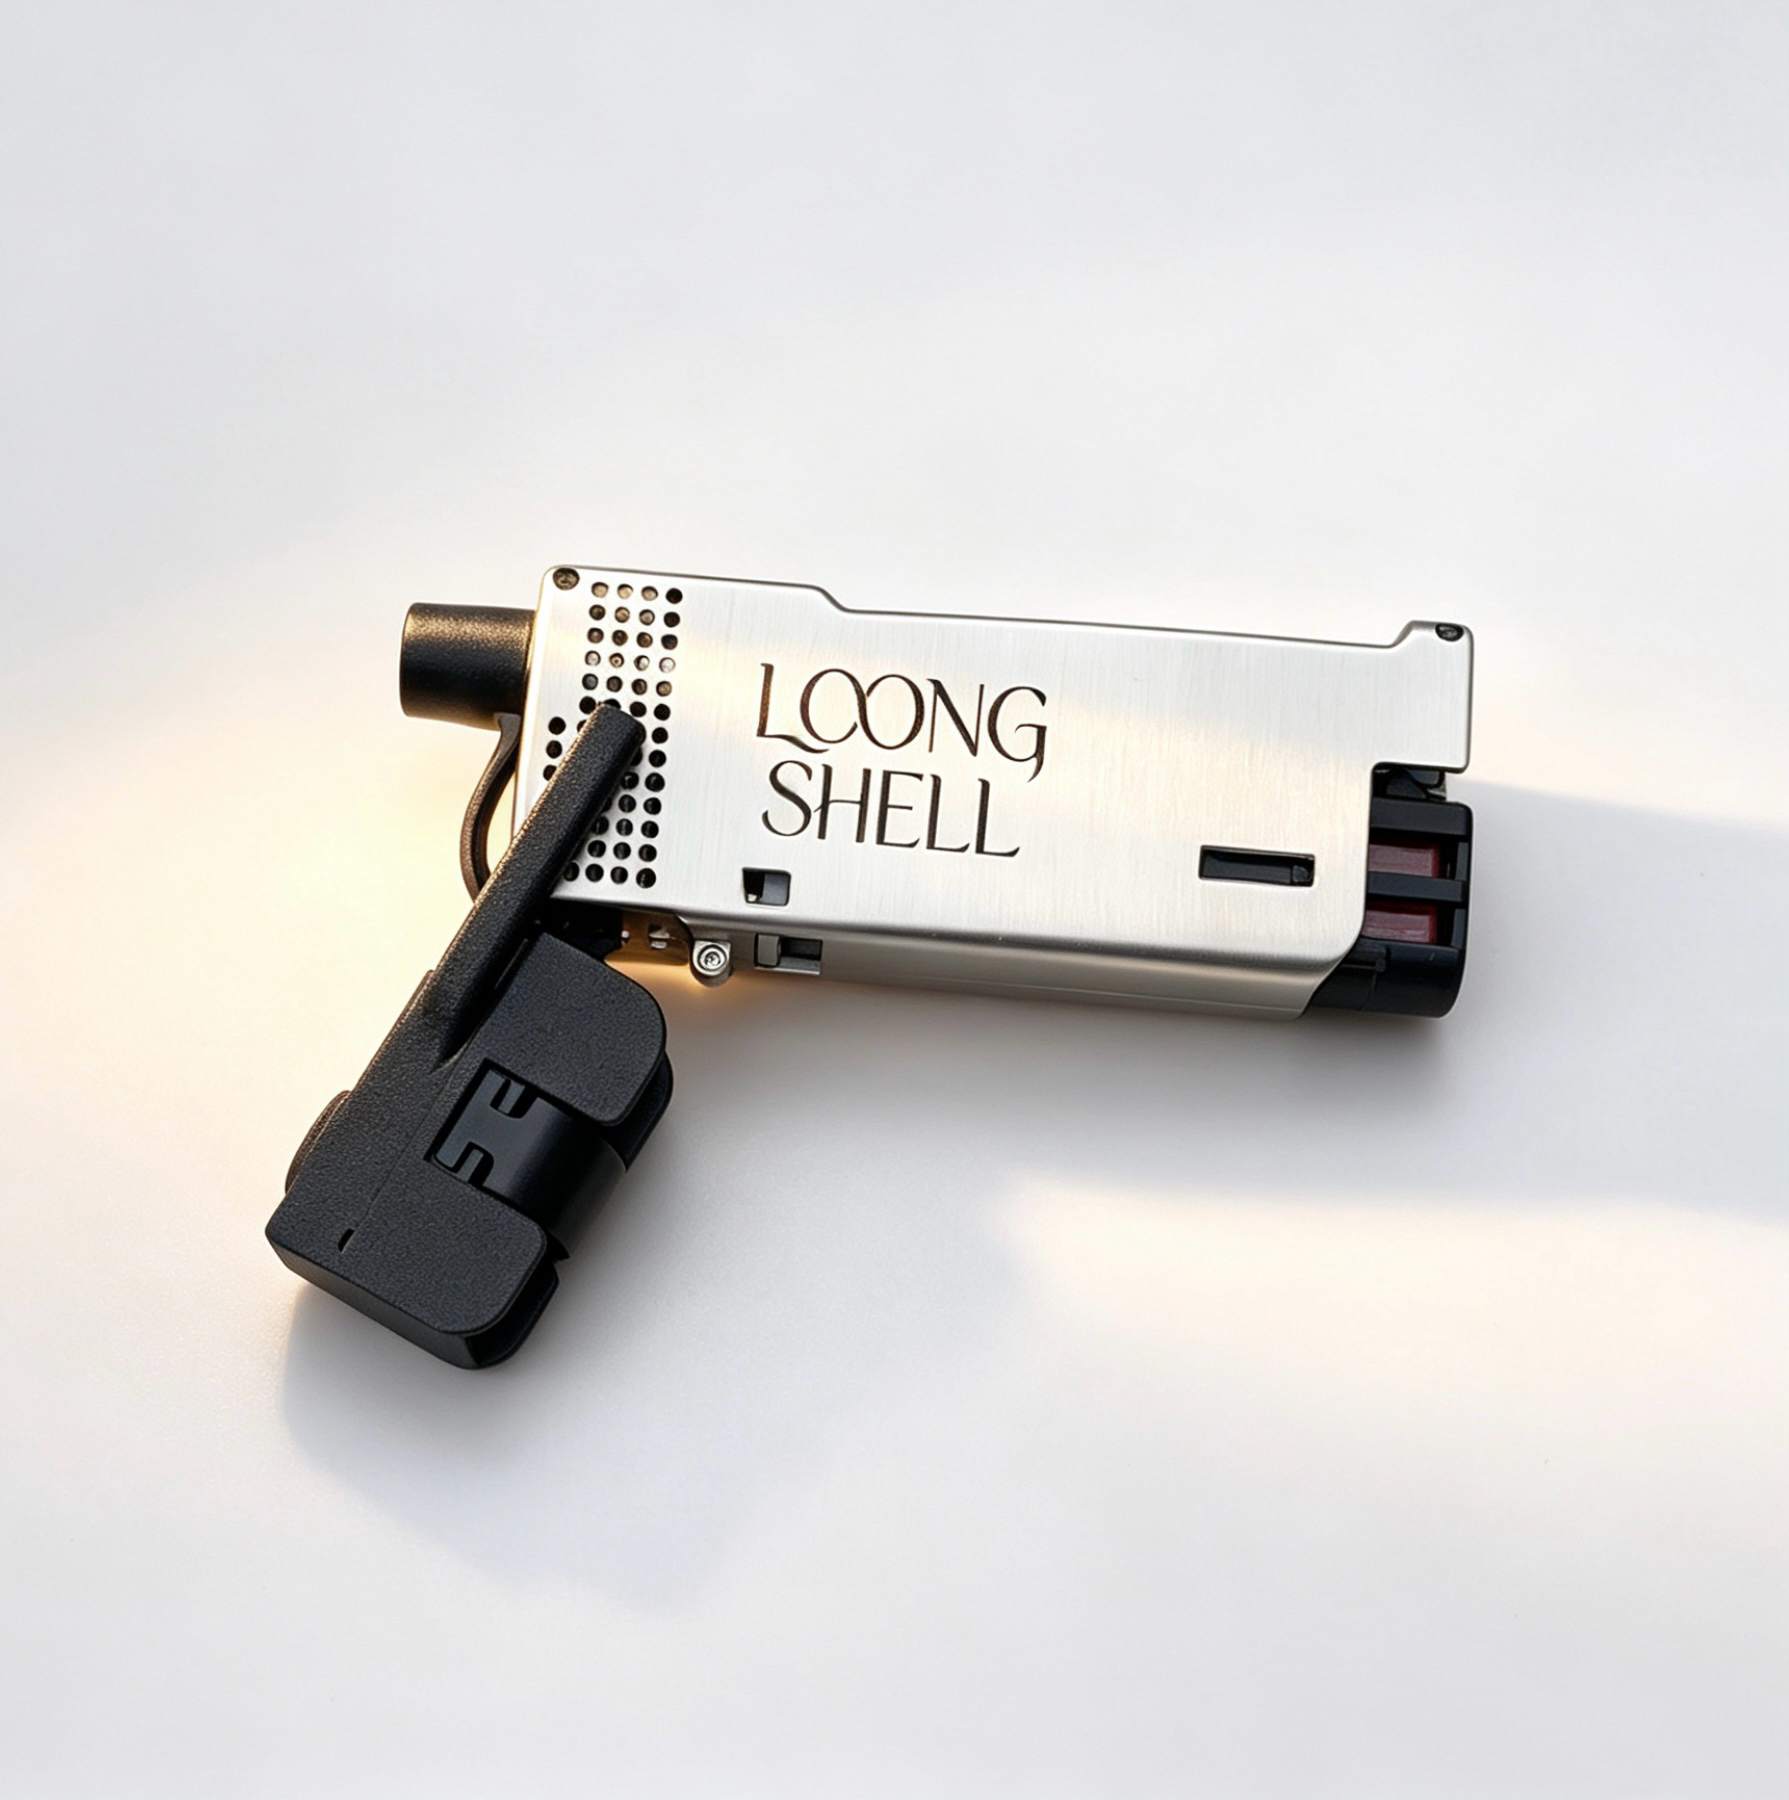
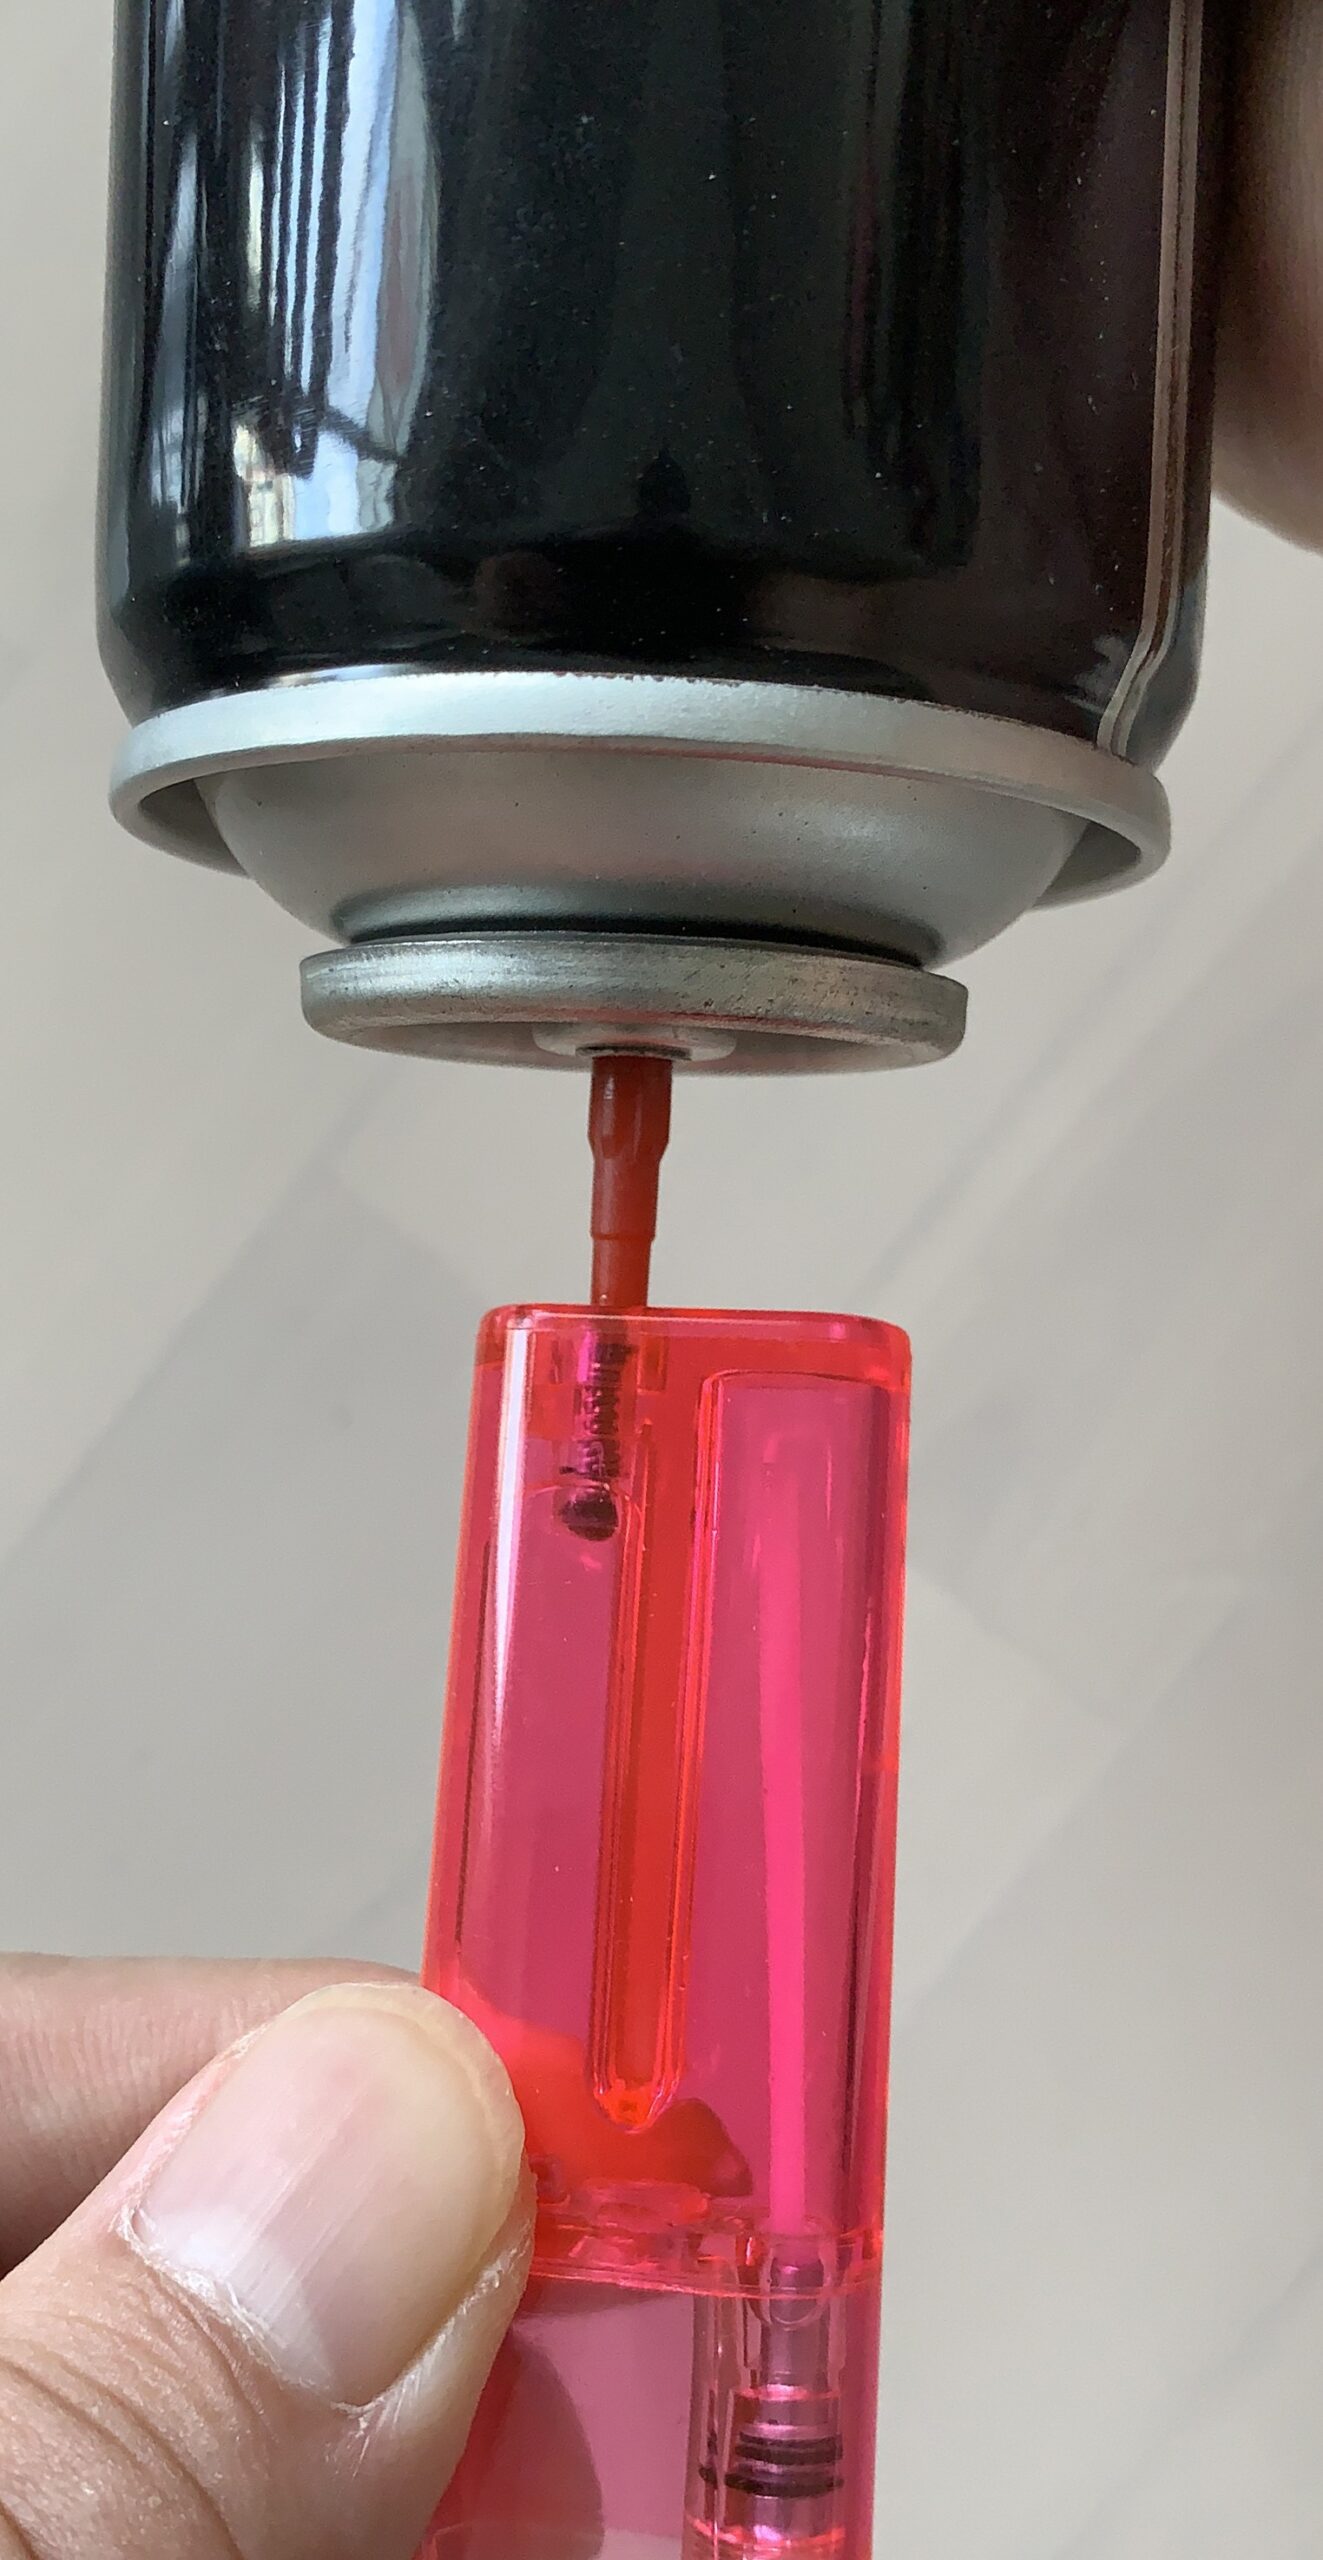
- Fill gas upside down.
Do not fill vigorously to avoid leakage.
Keep the gas capacity at 60% to 80% all the time, and the flame will be very stable

2. use knife to cut the Adjust Ring into 2 legs.
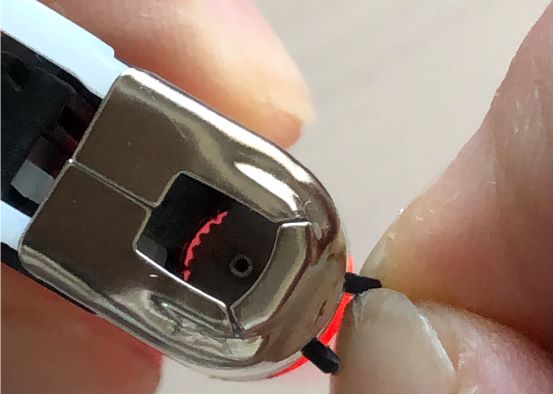
3. Grabbing one leg will be mutually slippery and the flame height can’t be adjusted.
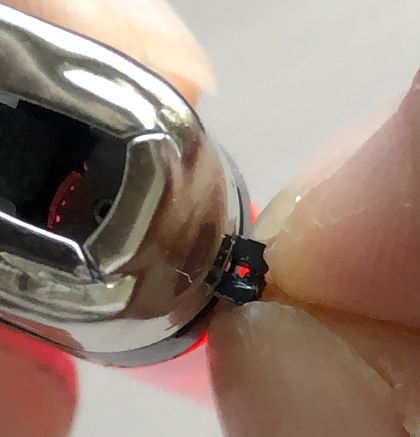
4. grabbing 2 legs, the flame height can be adjusted.
By grabbing 1 or 2 legs, the flame height can be infinitely adjusted.
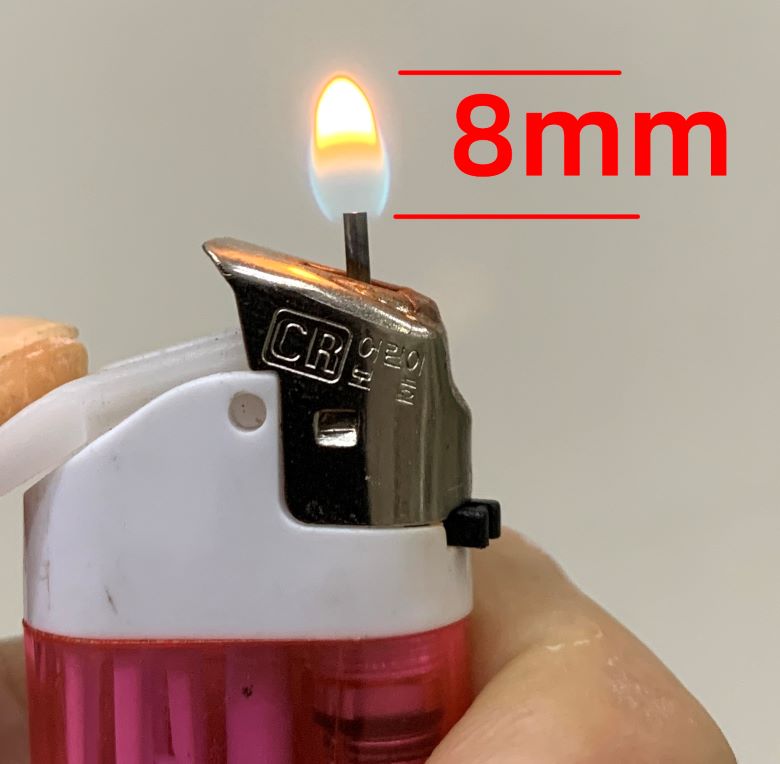
- 5. Make sure it’s a small flame!!
The flame mustn’t be big!!
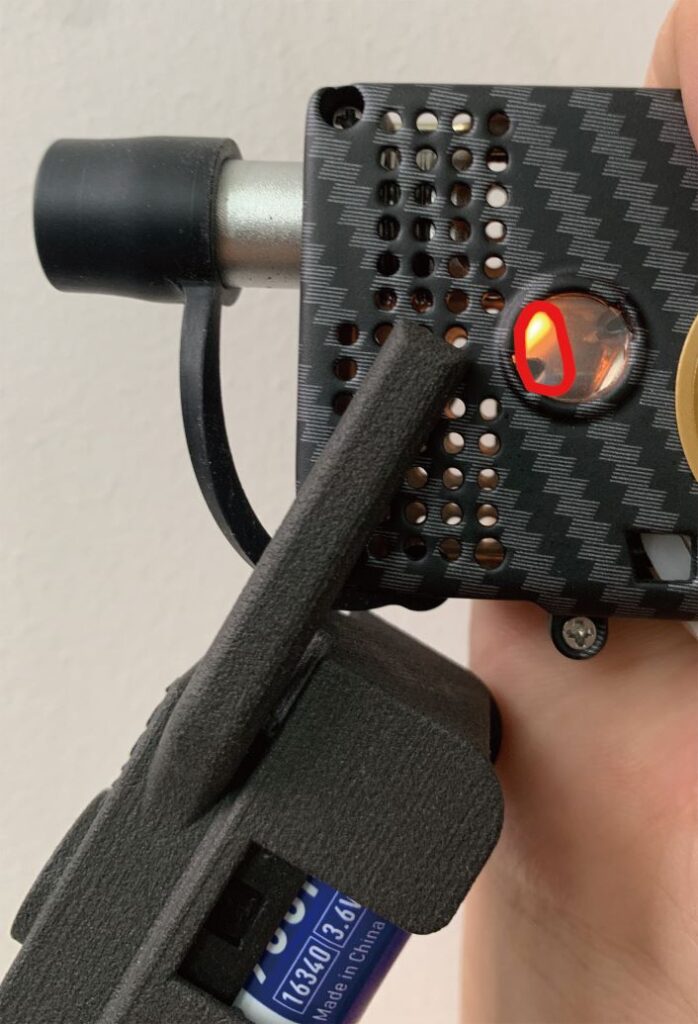
6. A small flame the size of a soybean!! The flame should be small. Keep the flame upward and avoid it from contacting the cigarette.
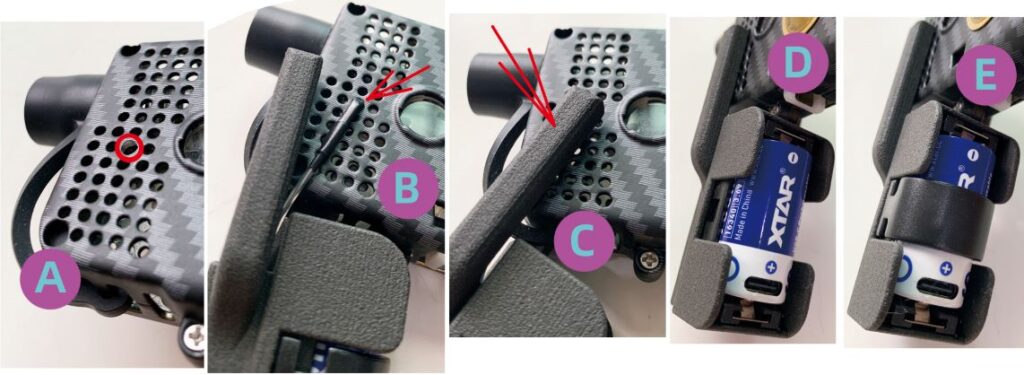
7. Insert the two wires of the “Nuwa Stone” into the sixth hole from the bottom, in the middle column of the Loong Shell, as shown in Figures A and B.
Then cover the two arms of the “Nuwa Stone” on the wires on both sides, as shown in Figure C.
Next, insert the 3.7V 16340 lithium battery with the positive electrode facing down into the “Nuwa Stone”, as depicted in Figure D.
Finally, close the Lid, as illustrated in Figure E.
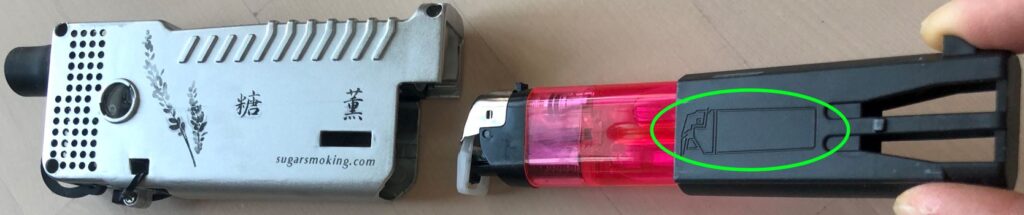
8. insert the lighter into Sleeve according to the pattern, and insert into the Main Body together according to the direction shown in the picture.
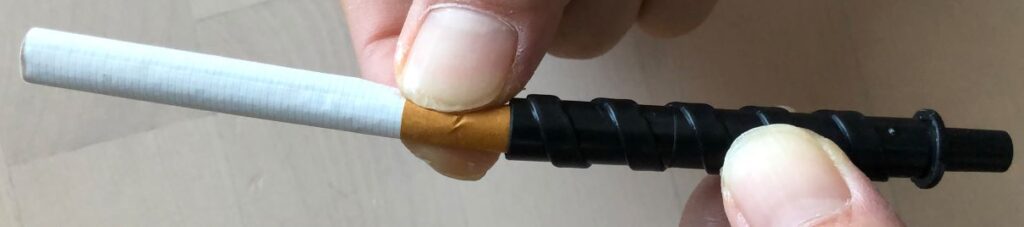
9. Screw the cigarette (standard size) into the Threaded Tube like a screw. Don’t insert it too deep, otherwise the final part of the cigarette will not be ignited and wasted.
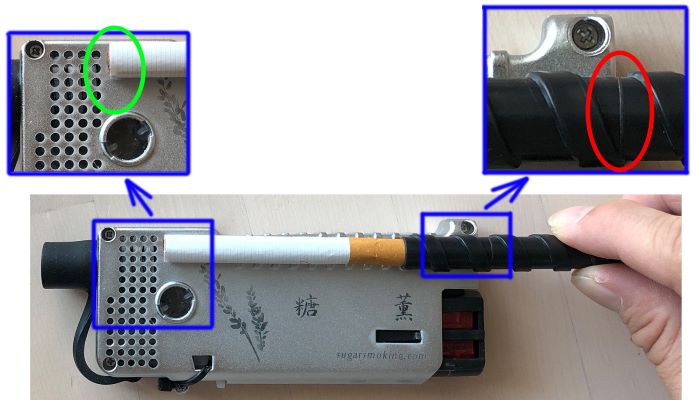
- 10. Adjustment of the depth for inserting cigarette(standard size) into the Threaded Tube: the left end of the cigarette is aligned with the “flame tip” (about 1 mm from the holes, see Green circle); The tick mark on the Threaded Pipe at the right end is aligned with the metal shell(see Red circle).
This adjusts the optimal depth of the cigarette into the Threaded Tube. Be sure to learn to align the end of the cigarette with the “flame tip”.
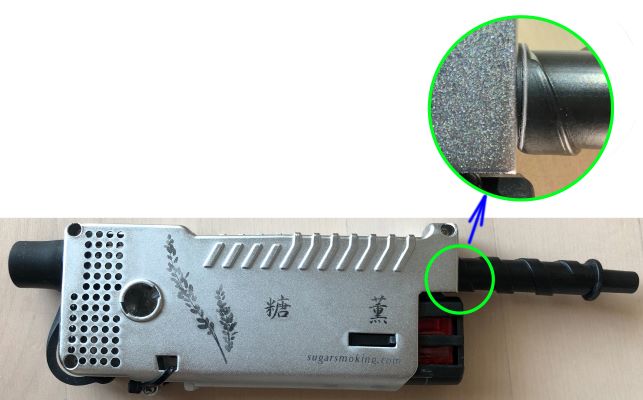
11. The Threaded Tube and cigarette together are screwed into the Main Body, and the tick mark on the Threaded Tube are aligned with the Metal Shell.
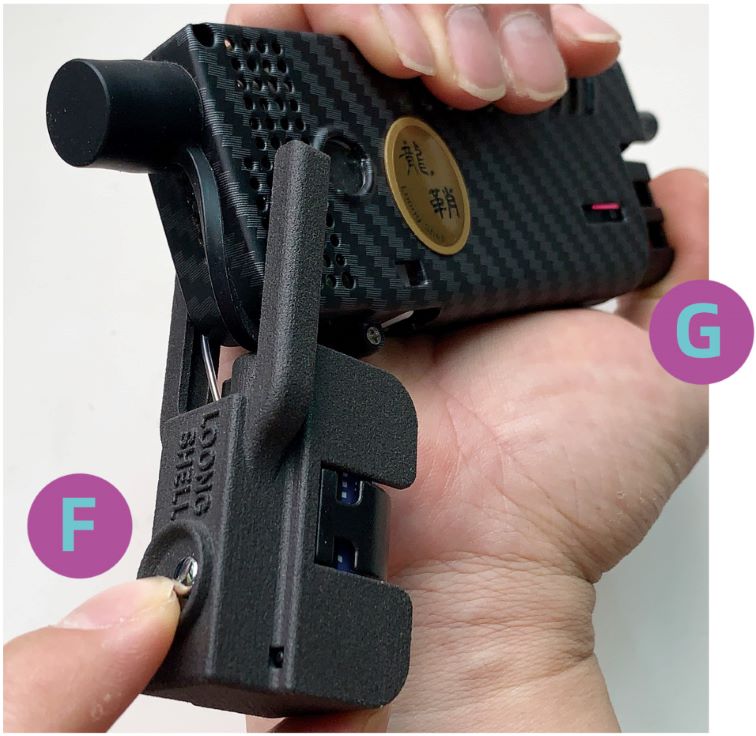
- 12. First, press the F discharge button on the “Nuwa Stone”, then press the G button on the right side. Once the flame is ignited, you can release the F discharge button. The Threaded Tube will automatically advance. Before smoking, empty burn for 6 seconds, then draw gently and deeply, sealing your lips throughout the process. Stop smoking when the smoke density is sufficient, and exhale the smoke. Be careful not to smoke too much smoke, and save some fresh tobacco leaves for your next puff. After smoking, release the G button, and the flame and cigarette will automatically extinguish.
If the flame is not ignited, you can press the F discharge button several times. When the flame noticeably diminishes, please have a short rest. The flame of the lighter will gradually grow back to its original size very soon.
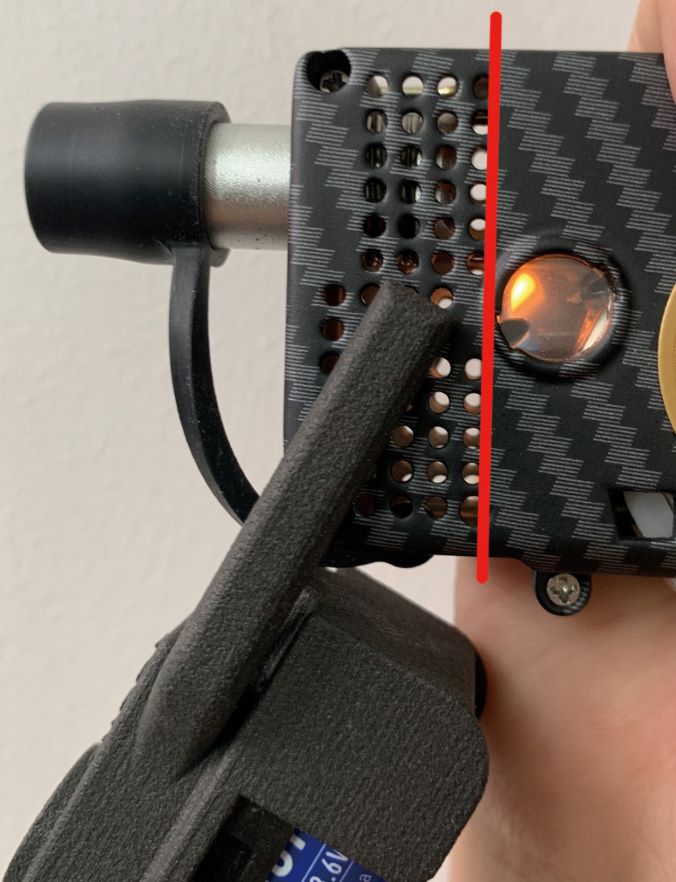
- 13. The outer edge of the flame on the far left should never appear in the first vertical hole (Do not exceed the red line). The flame must be small. A soybean-sized flame is sufficient.
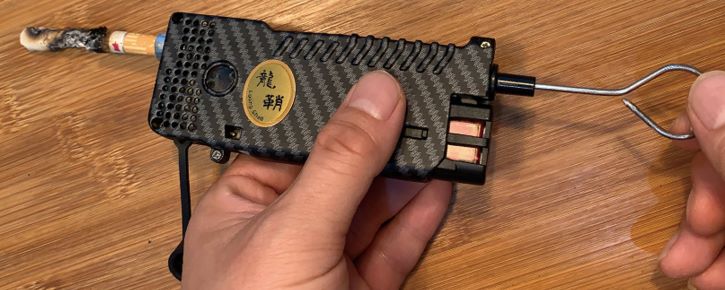
14. After the Threaded Tube reaches the endpoint, wait for 3 minutes to extinguish, then remove the Silicone Cap on the left end and use a long needle to poke out the ash.
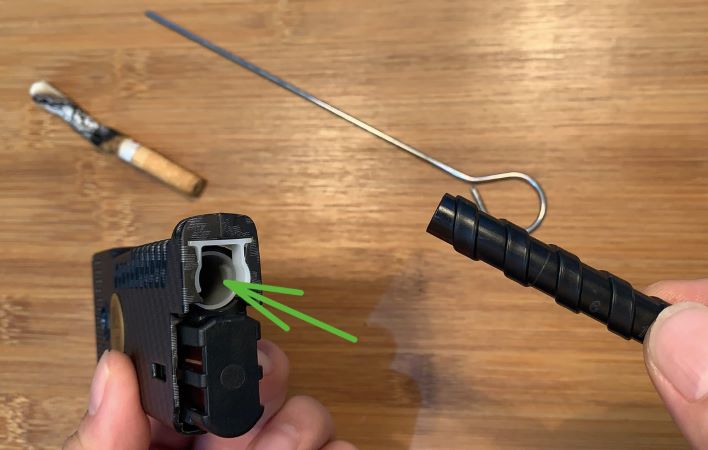
15. Unscrew the Threaded Tube out, and blow air towards the direction indicated by the green arrow to blow out any remaining ash.
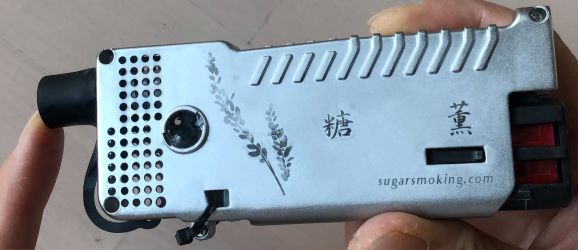
16. Finally close the Silicone Cap. The Silicone Cap should be kept on throughout the smoking period.
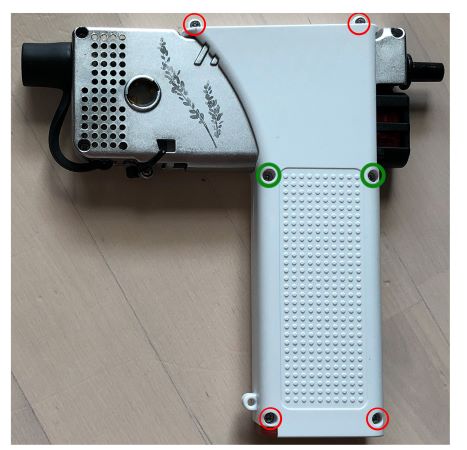
17. It is up to you to decide whether to install the Big Hand Handle(tighten the 6 screws in the picture, of which the two screws in the center green circle should be loosened a little).
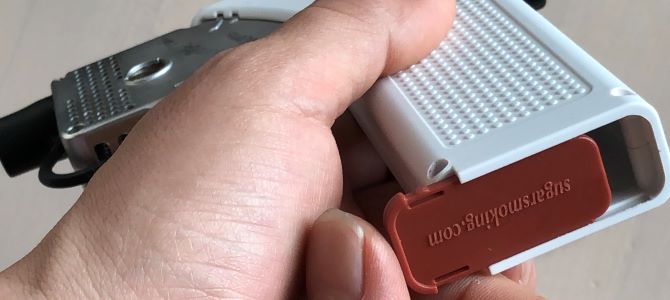
18. Install the Bottom Cover of the Handle, with the side with text facing outward.

- 19. When using non-standard sized slim diameter cigarettes, please install Adapter.
And make sure to check according to Clause 13 to feed the end of the cigarette to the “Flame Tip”.
Any questions, please contact us, we will definitely reply——–
Email: [email protected]